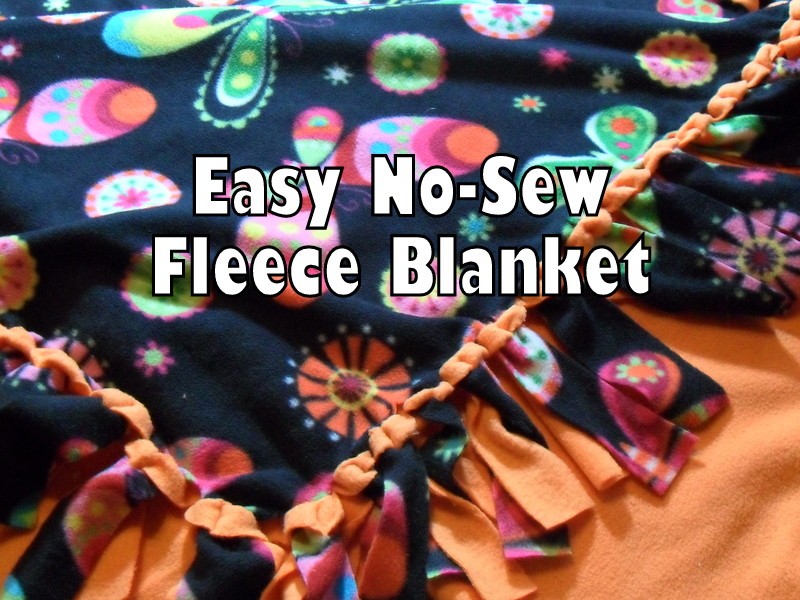
Go to any craft store and you will likely see tied fleece blanket kits. The “Easy No-Sew Fleece Blanket” uses a slightly different technique and you end up with a smoother, less bumpy un-knotted edge. Instead of knotting, we will use a “poke” technique. You will see what I mean in a minute. First, gather your supplies.
Here’s the list:
1 1/2 yards of 60″ wide fleece (I used a butterfly print)
1 1/2 yards of 60″ wide fleece (I used orange)
scissors
5″ square (or if you do not have one, you can measure with a ruler)
June Tailor Quarter Cut
rotary cutter
cutting mat
Choose complementary colors for the fleece. I think a pattern and a solid looks nice. You might want to try two solids for a collegiate look. For this project (a lap quilt), we picked out a colorful butterfly print and a solid orange as contrast.
[pe2-image src=”http://lh3.ggpht.com/-tL-KzM83fNA/Un2L_pjnsEI/AAAAAAAACHk/uqYFmVO7rEQ/s144-c-o/SDC11919.JPG” href=”https://picasaweb.google.com/110956043075394460751/November82013#5944061008802197570″ caption=”” type=”image” alt=”SDC11919.JPG” pe2_img_align=”none” ]
Most of the time, fleece has a curly edge that might even have some words on it. Go ahead and cut that off.
[pe2-image src=”http://lh6.ggpht.com/-WxpYH_ccz6Y/Un2L_xnZqXI/AAAAAAAACHo/jDiu_-z6S-g/s144-c-o/SDC11921.JPG” href=”https://picasaweb.google.com/110956043075394460751/November82013#5944061010965539186″ caption=”” type=”image” alt=”SDC11921.JPG” pe2_img_align=”none” ]
Now it is time to match the edges of the two fleece pieces. Put one on top of the other, wrong sides together. Square up the edges, and pin the blanket together so that it does not shift while you are moving it around.
[pe2-image src=”http://lh6.ggpht.com/-iji0dxhiNas/Un2L8QRDSmI/AAAAAAAACHY/ENeC9dRkClw/s144-c-o/SDC11922.JPG” href=”https://picasaweb.google.com/110956043075394460751/November82013#5944060950473820770″ caption=”” type=”image” alt=”SDC11922.JPG” pe2_img_align=”none” ]
Slide the cutting mat under one corner of the blanket. Carefully cut a 5″ exact square. We will cut a 5″ square from each corner. I think it helps to keep the blanket straight if we cut one corner, then work toward the next corner, and then cut a 5″ square, rather than cut all four corners at once.
[pe2-image src=”http://lh6.ggpht.com/-RI7xbUKJu8I/Un2MAhX2YSI/AAAAAAAACHw/lLH4RsTXj20/s144-c-o/SDC11924.JPG” href=”https://picasaweb.google.com/110956043075394460751/November82013#5944061023785214242″ caption=”” type=”image” alt=”SDC11924.JPG” pe2_img_align=”none” ]
We are going to cut strips 1 1/2″ wide by 5″ along each edge. Between each cut, we will cut a short 1″ cut between. [pe2-image src=”http://lh4.ggpht.com/-aPyd00oWXZc/Un2Vyt9w1dI/AAAAAAAACJQ/xOsBB5LTRzs/s144-c-o/scheme.jpg” href=”https://picasaweb.google.com/110956043075394460751/DropBox?authkey=Gv1sRgCLKD2eWJqtH-SQ#5944071781763569106″ caption=”” type=”image” alt=”scheme.jpg” pe2_img_align=”none” ]
I like to use June Taylor’s Quarter Cut for this task, but you can also measure and cut. When I use the Quarter Cut template, I use painter’s tape to mark the lines. I put the tape 5″ from the edge, and mark the grooves that are long and short cuts.
[pe2-image src=”http://lh5.ggpht.com/-CGI4H1AmFuU/Un2LQM_XC1I/AAAAAAAACGg/u19ALU4pBEU/s144-c-o/SDC11925.JPG” href=”https://picasaweb.google.com/110956043075394460751/DropBox?authkey=Gv1sRgCLKD2eWJqtH-SQ#5944060193680067410″ caption=”” type=”image” alt=”SDC11925.JPG” pe2_img_align=”none” ]
Make sure the edges of the blanket are very neat and straight. Put the template over the fabric and cut the strips as noted above. When you get near to the next corner, stop and cut the 5″ square from the corner, then complete your cuts. Turn the corner and begin again, cutting 5″ strips that are 1 -1/2″ apart, with a 1″ small cut near the top of the strip.
After cutting all around the blanket, set your cutting tools aside. Here is where we will use the “poke” technique. Pick up a two layer strip; hold the top strip in one hand and the bottom in another. Poke the top strip into the small cut in the bottom strip. Now the bottom strip is on top. Poke this strip into the small cut in the other strip. In other words, poke top in slit, then poke top in slit. I used butterfly fabric and orange fabric, so my mantra went something like this: butterfly into orange, orange into butterfly. Gently pull through.
[pe2-image src=”http://lh4.ggpht.com/-gQsTd8Ah_Vo/Un2Za_PX4EI/AAAAAAAACJo/RtMMmsevj7E/s144-c-o/2013-11-08.jpg” href=”https://picasaweb.google.com/110956043075394460751/Seamcrazy02#5944075772130484290″ caption=”” type=”image” alt=”2013-11-08.jpg” ]
Here is a close up of the pokes:
[pe2-image src=”http://lh4.ggpht.com/-0l2-cbhv-GI/Un2LOY1VoKI/AAAAAAAACF8/jj5WjcnSvC0/s144-c-o/SDC11936.JPG” href=”https://picasaweb.google.com/110956043075394460751/DropBox?authkey=Gv1sRgCLKD2eWJqtH-SQ#5944060162499518626″ caption=”” type=”image” alt=”SDC11936.JPG” ]
And a longer view:
[pe2-image src=”http://lh4.ggpht.com/-rOCV-Hb6-hI/Un2LR0iXIFI/AAAAAAAACHM/-ZPHWtzrcW0/s144-c-o/SDC11935.JPG” href=”https://picasaweb.google.com/110956043075394460751/DropBox?authkey=Gv1sRgCLKD2eWJqtH-SQ#5944060221475725394″ caption=”” type=”image” alt=”SDC11935.JPG” ]
This no-knotty “poke” technique makes a great baby blanket, too. It’s also super as a lap blanket now that the weather has started to turn a little chilly.
sEaMcRaZy Edna has been enjoying her cozy new “Easy No-Sew Fleece Blanket,” and we are thinking about making another very soon…..


